Tuesday 30 August 2011

Co-reDinated...

Ah, yes, my titles still leave a lot to be desired but! I am back again with another piece made using those fabby Distress Co-reDinations card. I used the Wild Honey and Barn Door sheets to make covers for a little book I have just put together. Ooo and before I forget... Co-reDinations are on special offer for this month... so you can grab yourself a bargain HERE.


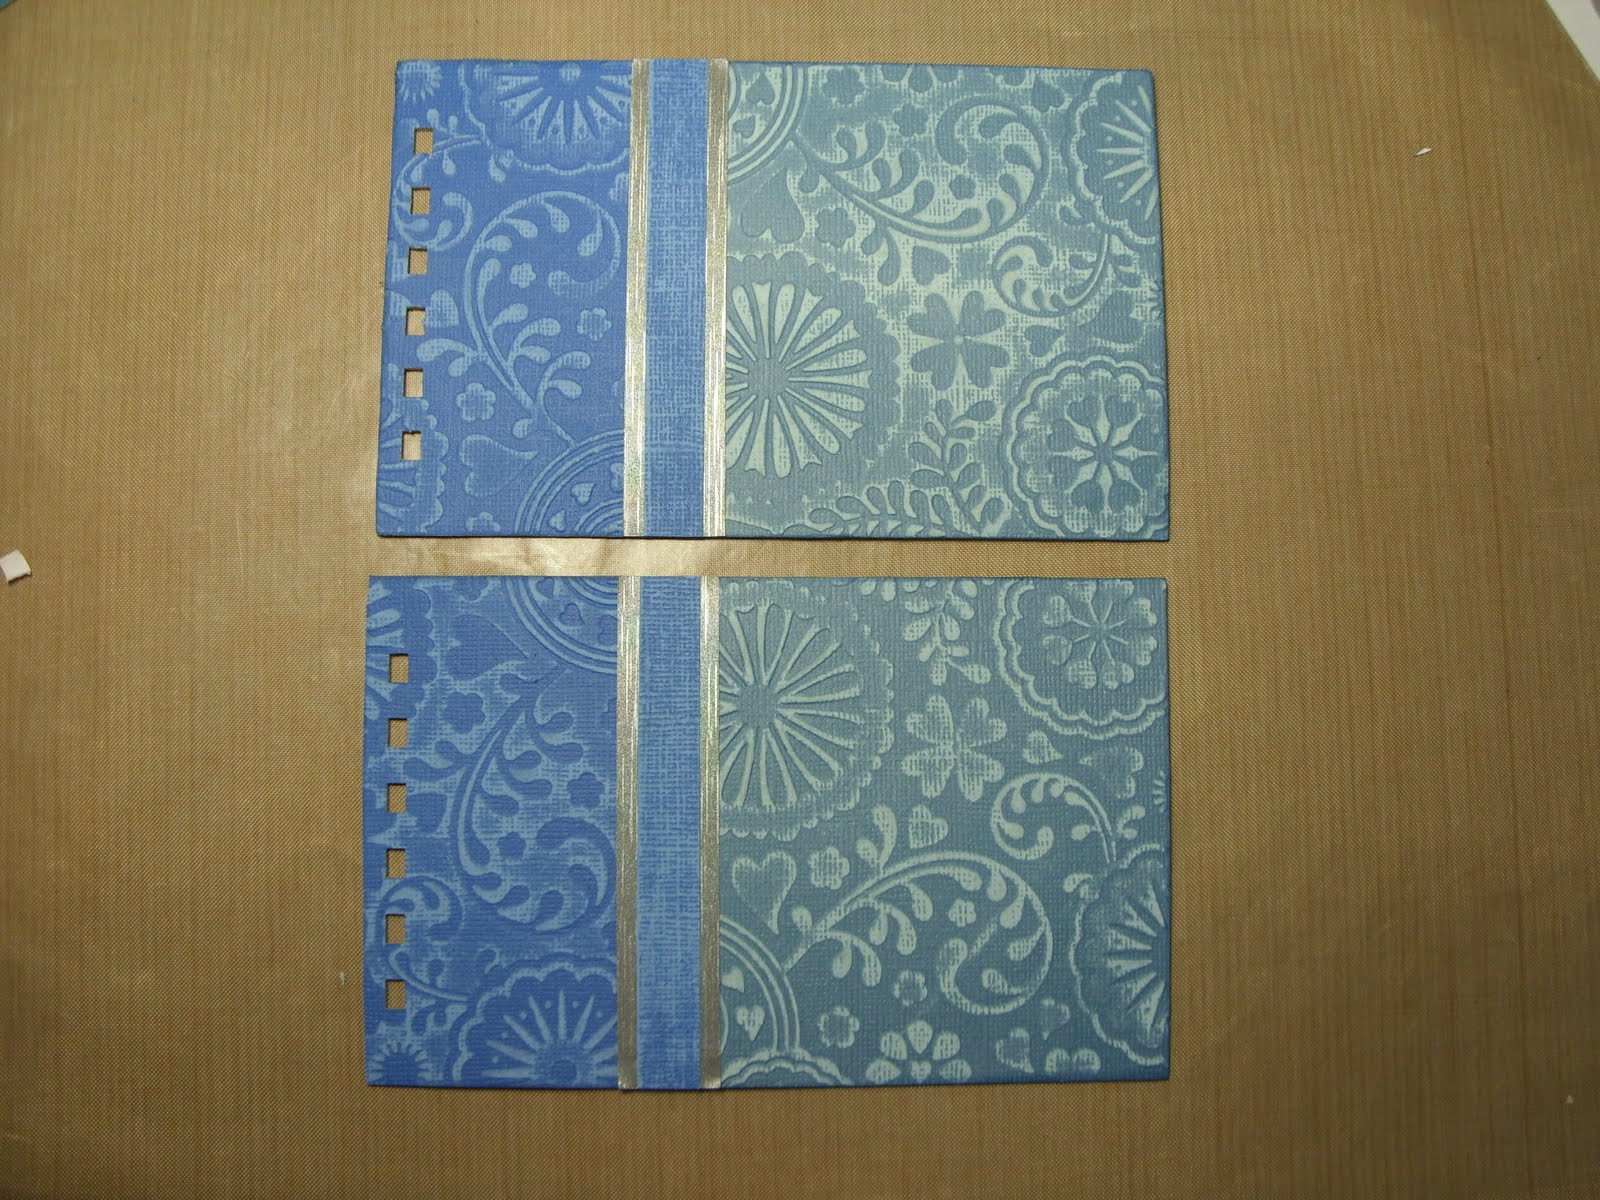
I started by cutting the card to fit the covers and then embossed using Texture Fades... the retro circles have to be my fave! I used Tim's Sanding Grip and gently rubbed over the surface of the card, removing the colour on the raised bits, leaving the paler colour showing underneath.


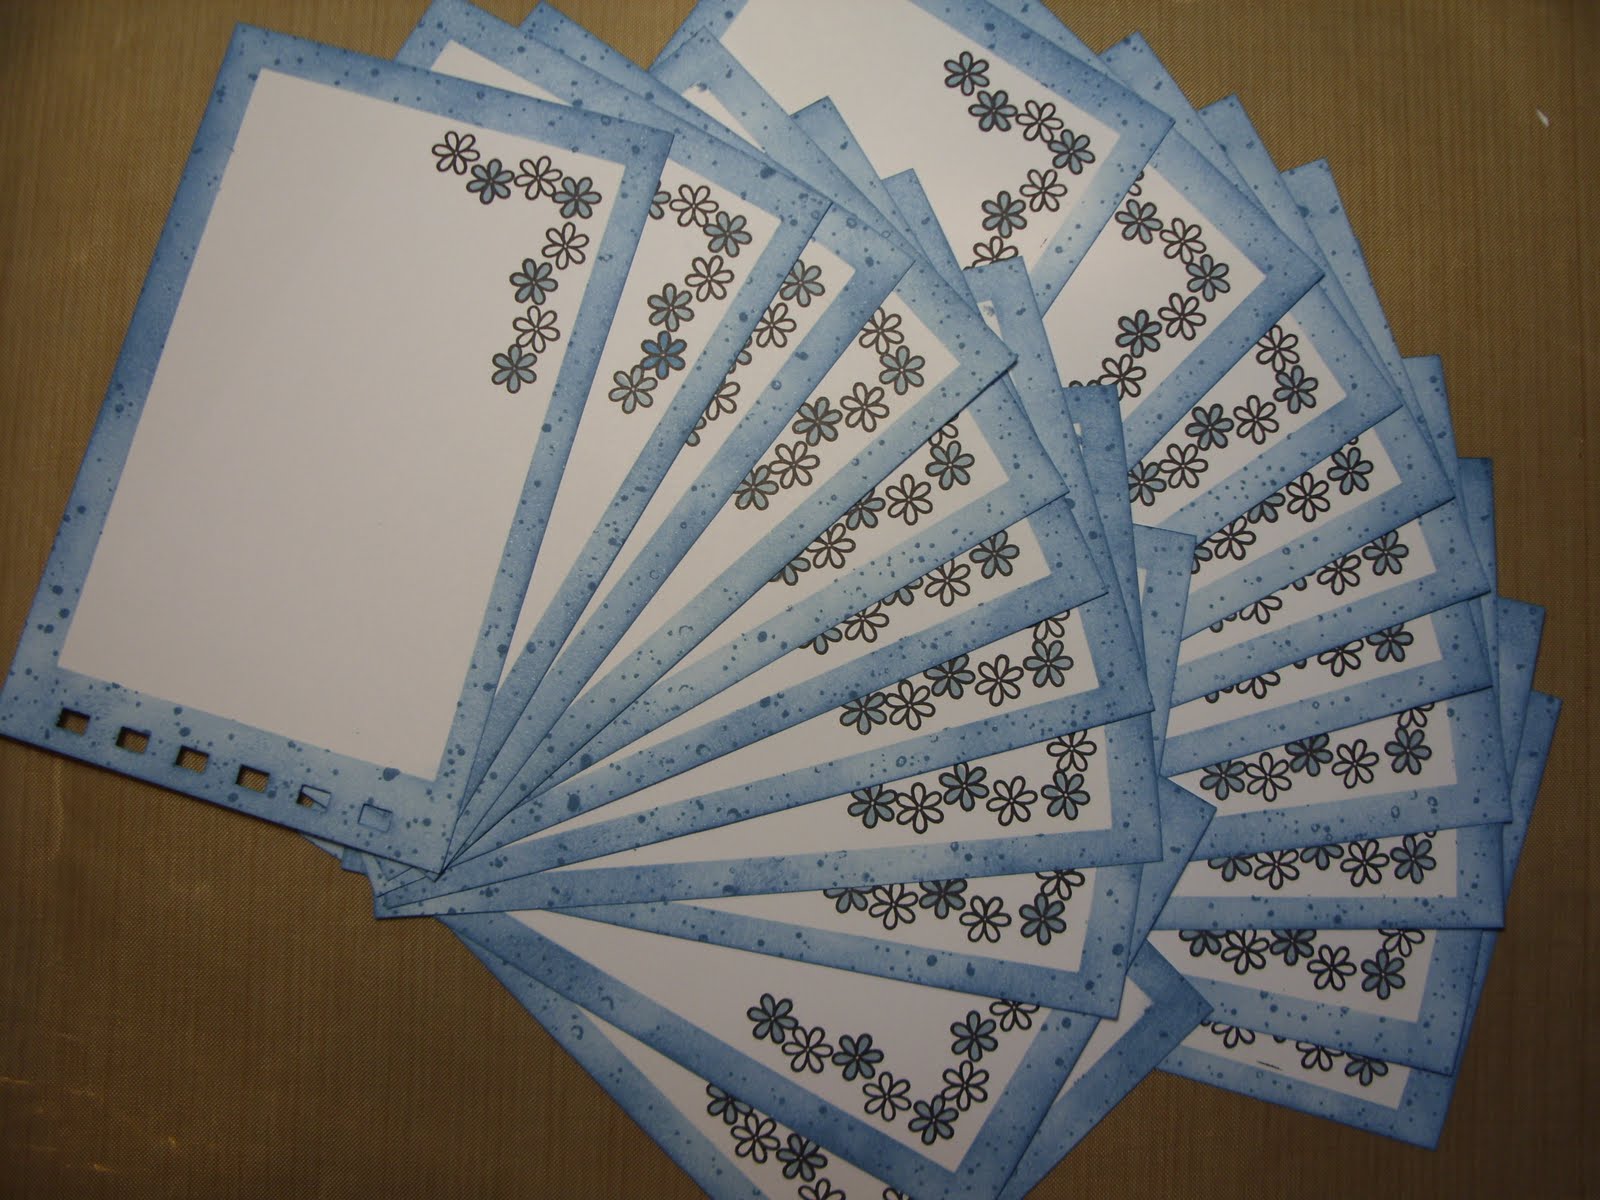
I used Wild Honey and Barn Door Distress Stain to colour some card, stamped my words in Black Archival and then matted these onto some more of the cardstock. I used a black Dabber to whizz around the edges to close the whole design in.


Finally I decorated the book cover with some little Faux Porcelain flowers - making these is simples... fill up your Melt Pot with clear UTEE and once it is melted, carefully dip your flowers into the UTEE, allow to go hard on a craft sheet and then you can use them on all different kinds of projects. I used a couple of Idea-ology bits and bobs to decorate the book rings and that was my book finished!

Thanks for looking... TTFN

Hels x

Sunday 28 August 2011

My 3rd & final Guest Designer spot by Anneliese Bates

For my last project, I thought I would do some of what I like doing best ... Art Journaling ... I used the stamps to help create the background and border on this page.
The stamps I used were:
Baroque Background A6
Birds of a feather A6

I started by spritzing the page with water, then adding Ranger Colour wash in oranges and greens. spritz with a bit more water to blend them together.
Find Colour wash here

Next add some Distress Inks and blend with a baby wipe

Then using some stencils add some circles, the large ones I did with Colour wash, the small with adirondack dabber in Snow Cap
I then highlighted areas of the page with a dabber in Pool.

I used some archival ink and the baroque background stamp to create a border down the side of the page Archival ink can be found here

I added the birdcage image next using one of the phrase stamps as the chain by which it hangs, and I stamped the bird house next, and used the other phrase to create the post on which it stands.

Last but not least I added a computer generated phrase " A little bird told me" inked it, painted it & distressed the edges with Distress ink ...

I can't write what it is the little bird told me yet,as it's a big secret, can't even tell my husband yet lol, But it's an exciting secret to do with someone who I know and really it's their secret but let's just say I had a friend who ....?!!
Hope you like this last project of mine, Thanks to Jennie & Hels for inviting me to play here... if you did like it please feel free to pop over and visit my blog over at www.anneliesebates.co.uk
see you soon :o) x


Saturday 27 August 2011

'Sew' Far 'Sew' Good by Nicky Cresswell

Hello my stamping pals
Here I am for my last post in august and this time I want to share with you an 8" x 8" canvas.
 I was looking through my stamps and my dressmaking set just spoke to me, so out they came and the fun began.
The canvas already had some kind of primer on it so I got straight into the stamping, which I did directly onto the canvas using coffee coloured archival ink. I used one of my thin acrylic blocks behind where I was stamping to give me a more secure base to push onto.
I think I pretty much used every single stamp for the dressmakers plate, to collage the whole canvas and the sides too..
Then I coloured the canvas with a mix of antique linen and scattered straw distress stains {OMG talk about a quick and easy method to colour something in seconds}
The next thing I did was to cut a Timmy dressform in both mountboard and some wild honey core'dinations, layering it up to fashion an outfit with some added plain seam binding that I coloured with scattered straw distress stain.
 I made a focal backdrop for the dressform with a piece of the sewing paper from the crowded attic pad, I then coated the whole canvas with some studio matte medium and stuck a piece of real dress pattern over the entire surface. Once this was dry I used some more core'dinations that I had run through some of the texture fades pattern and stitch folders and finished with some vintage buttons.
I didn't have any great sewing words or sayings so I hopped online and found a quote I liked then punched it out using my dymo and cut strips of yet more of the core'dinations wild honey. This works great as you can sand the embossed letters to make them pop, and also it matches in with the project perfectly.
And there you have it.. I must admit I had an absolute blast making this {even though the day leading up to it was a mojoless nightmare!} Just goes to show even with no mojo the right stamps can truly inspire you to make something fabulous.
Thanks for stopping by.Until next time..
Stay Inky

Thursday 25 August 2011

Blue Denim Note Book by Kat

Hi all,
Kat here, with my 3rd & final project of the month,

Apologies for the rubbish post names,
I never know what to call them,
so I usually just write what I see (lol)

with core'dinations card stock as our focus
it seemed only natural to make a note book.
so here it is,


I started of with 2 pieces of grey board cut to size
I then cut the core'dinations card stock in 2 different blues
slightly larger, so if it shrank when it was embossing
it wouldn't be to small.

I then embossed with the same design,
but by turning the card pieces over
you get an embossed & debossed pattern,
I then sanded it with Tim's sanding grip
here's the difference in the patterns.


I then glued them with
I glued a silver strip over the join
& added another sanded strip of the darker blue core card
I trimmed it all back with a craft knife,
I glued the silver paper to the inside of the covers
& trimmed it back,
then cut the holes with the bind it all machine.


for the pages I cut them a couple of mm smaller than the covers,
I didn't count them (just made a small wedge)
then with a scrap of card slightly smaller than the page
for a mask & a
then added the texture with Stipple background stamp
I added the small flower chain off the flower blooms set
coloured with a copic marker.


punched the holes with the bind it all
& put it all together with half inch 0 ring.


I made the flower from the same stamp set
I glued a button in the center & added some leaves
cut from a sizzix die & the same core'dinations card stock
& glued it to the cover.

here's the stamps I used,


& there you have it,
Jobs a good-en

Hope you like it!
have a creative day,
Kat x.


Wednesday 24 August 2011

Tick Tock by Alison Hall

Hello Stampers! I'm back with my final piece for August. I had a lot of fun with this card, I can tell you! It has a bit of a manly theme going on, so it fits nicely with the August Challenge of Macho Men. There's still a few more days to join in! I also used Core'dinations paper, which is on special offer this month HERE.


Here's how I made my card...

Using a deckle-edged metal ruler, I tore a 5.5 inch square of peeled painted Distress Core'dinations paper. Next, I thinned down some Claudine Helmuth traditional tan Studio paint with a spritz of water, & applied a wash across my paper. I sanded over the edges with a sanding grip to give a distressed look.

I used vintage photo distress ink to stamp the Winged Wheel over my background. I stamped Phineas Pinchbeck on the left, using archival black ink, then, using the same ink, carefully stamped the empty Inspiration Jar over the top of Phineas. I coloured this in, using peeled paint & vintage photo distress inks, dried it with my heat tool, then covered the jar with a layer of glossy accents.


Whilst the glossy accents was drying, I stamped some pocket watches from the Time & Keys plate onto the clear side of some frosted shrink plastic, cut them out, then shrank them with my heat tool. Next I stamped the words Tick Tock onto white card, using the large & small scrabble tiles from the Scrabble & Tags plate. I cut out the words, then inked them with vintage photo distress ink.

Going back to my now dry background, I smeared bead gel around the edges, using my fingers. You can use a palette knife if you wish! Once this had dried, I applied lava green Inka Gold to highlight the little beads. Told you I had fun!


Finally, I glued the words & watches to my background, attached it to a square card blank, then inked the edges of the card with more vintage photo distress ink.

Thanks for looking!
Alison xx

Tuesday 23 August 2011

Retro starburst

It's almost the middle of the week, and I thought with my meltpot workshop just gone, and lots of new product in the shop, that I would show you a little brooch that I made with the new chipboard, and a little UTEE!
I used 3 of the new white faced chipboard flowers, and inked them up in 3 shades of Distress stain blue.
Then I stamped them with the new mini polka dots background stamp in Adirondack Dye ink Denim.

 I then cut the flowers in half with a craft knife, and covered them in Versamark, and then poured UTEE over them. Heat until melted, and repeat twice more.


As soon as the last layer is melted , take the mini polka dots (uninked) and put into the UTEE. leave until cooled, and remove the stamp. Add some gold Perfect Pearls , and glue together. I added a very retro button, and a brooch back.


Love this as it evokes the 1920's .
You even get another set to make one for your friend!
Have a very creative day
Jennie

Sunday 21 August 2011

Tear in the landscape by Sioux Jenneys

Happy Sunday! Are you putting your feet up and relaxing today?

I'm here to share a really simple card utilising the tear able qualities of Core'dinations :)


1. Roughly sketch where you would like your rocks, sea, sand and distant mountains on a spare piece of paper the same size as your finished area will be.

(Mine is a 6 inch by 4 inch postcard size)
2. Staaaaaaaart tearing!!! LOL Follow the sketch you have done and tear by eye or if you are feeling a bit unsure lay your sketch on top of the Core'inations and tear through both pieces. ;)

Do you remember back in the day when tearing paper was the new big thing? I could not bring myself to do it for ages! LOL Then I read a little tip somewhere (I wish I could give credit but it is so long ago I have not a clue!!) to save some of the envelopes your junk mail comes in.....'cos a lot of them have coloured or patterned interiors....and use these to practise your tearing ;)........It helped me overcome the hesitation :)
3. Using a blending tool and foam colour the sky area with colours used in your landscape....I used Distress Ink spiced marmalade and worn lipstick as well as a little Adirondack stream.

4. Spritz a piece of paper with some Distress Ink broken china, stamp the Round the World with peeled paint and cut out edging it with a black marker.

5. Attach the torn layers to the card.....sanding some of the rocks in the foreground and slip the world behind the last layer as you stick it down.

6. Stamp the lovely new sentiment "Into each day" in Archival black and layer onto a piece of Core'dinations...edge both with a black marker and attach with dimensional pads.

7. Finally mat the postcard sized piece onto another Core'dinations mat and attach to the card.


xoxo Sioux

Friday 19 August 2011

Find Delight in the Everyday things by Tina Barnett

Hi ! I am back with more Mabel Lucie Attwell stamps. This cutie is called "Ah! There you are". It's by The Artistic Stamper

I have gone Coredination mad on this card! I just love how all the colour work together.

I started with an 8inch by 8inch card stock. I added some green Coredination card to the base, I then chose 4 other colours and cut them to equal in size squares. I then used Tim Holtz Embossing folders and then distressed the card.

I added the card to the main card then used some nestibilities and cut and distressed some Coredination card stock and mounted the stamp on top.


The image is coloured using the water coloured Promarkers. I have used water colour card.


I used a Wendy V stamp for the sentiment and finished off with some flowers and distress stickles .

I LOVE the Coredinations! you have to give it a try!


Thanks for looking, until next time xxx

Hugs Tina xxxx

Wednesday 17 August 2011

Not my usual! by Nicky Cresswell

Good day to you fine stampers, I am back again but this time with something a little different. 
Now It's taken me a little while but I am finally getting into the whole journaling thing.
So when Jennie shared that she was launching new journaling stamps I was over the moon and couldn't wait to get my inky mits on them.
And this is what i came up with.
 I started with an uneven coat of traditional tan claudine hellmuth studio paint, once dry I washed over a coat of broken glass distress stain. I then added a smidge of picket fence distress stain just running across the center of the page. 
I stamped the 3 circles from the swirls, splats and dots plate across the center in black archival ink, and edged the whole page using one of the splats from the same page.
I finished with the words Happy which was taken from the Journaling words plate and the Creative with is from the massive create art thought phrase {but I cut them as separate words as there such a nice size they can work on there own} As one last finishing touch I gave a couple of the circles a mini crown which I punched out of black soot core'dinations card {which is still on offer HERE}
And there you have it.
So don't be afraid any more, Get out your inks and paint and stamps and just have fun. 
If I can do it you can too.
Thanks for stopping by x
Stay Inky

Tuesday 16 August 2011

Fun & Laughter by Alison Hall

Hello Stampers! I've a very simple little hanging for you today, using layers of Core'dinations paper, which just happens to be on special offer here.


To begin, I tore 3 rough rectangles of Core'dinations paper. I sanded all three pieces, the larger two on the textured side, the smallest rectangle, on the smoother side.

I stamped the new 'Into each day' phrase onto the smallest piece of paper (lake mist, from theAdirondak stack), then I stamped the tiny butterfly from the Insects & Butterflies plate, using grey ink, in the corners. I then matted this onto the slightly larger 'rectangle' of card (tattered rose from the distress stack).


I wrapped a piece of grey vintage ribbon in a bow around the bottom of my artwork, gluing it in place with wonder tape, then attached a butterfly charm, using chain & a jump ring. I found this charm, whilst on my paper round recently! Lol!


Next, I matted my artwork onto the largest 'rectangle' (stormy sky from the distress stack), added a couple of grey eyelets, then threaded some grey vintage ribbon, to hang my artwork from.

I think this would make a nice gift for a friend, & it cost very little to make.

Thanks for looking!
Alison xx


Monday 15 August 2011

CAPTURED one fairy in a jar.

Hi All,
Kat here, AKA Kat's craft creations blog

OK, so strictly she is a ballet dancer & not a fairy
but don't hold that against me,
in my imagination she is a ballet dancing fairy (lol)

The design team focus is still on core'dinations card stock
so here's what I came up with,


I took a clean, empty coffee jar,
(something I have in abundance,
because my husband drinks coffee,like it's going out of fashion (lol)
& taped some fantasy film to the back side of the inside of the jar
(this makes your eye focus on whats inside the jar
instead of looking through it)
I then stuck flat back gems in blue & white to it.


Next I made an acetate stand to keep my fairy in place,
(I cut a circle, made a slit in the middle,
poked an oblong piece through it & bent & taped it)
to cover this I used fantasy fibers &
star & flower flat back gems as accents.


I stamped the dancer from dance stamp A5
designed by Sioux Jenneys,
the wings & bodice are stamped in Chipped Sapphire Distress ink
& blended with Faded Jeans distress Ink 
I gave her, her skin colour with a copic marker
cut & layered her, then stuck her to her stand
& placed it all inside the jar.


For the lid I used core'dinations card stock
I cut a circle ruffly twice the size of the lid
scored lines in it on a score board,
then sanded it with Tim's sanding grip
to revile the core.
I then placed it over the lid & secured it with an elastic band
I trimmed it with Idea-ology flower trim


For the tag,
I coloured it with the direct to paper technique &
I distressed the edges with Tim's Paper Distresser
Then adhered a label I made on my computer
with all the fairy facts on it, to the tag,
I used Metal Bead Chain to attach it to the lid
& embellished it with a metal butterfly
(off an old necklace)


stamps I used,


& there you go, job done,
Hope you like it!

Have a creative day,
catch you next time,
Kat x.